Resource Centre - Column Filter
Video Tutorial
Column filters are available in most modules and can be used to filter data to narrow down the information presented in the module’s list view.
 The column filters are dependant on your Encounter and Days Back filters.

Filter by Column Keyword
Filtering a column of data by keyword(s) allows you to filter a list of module information (example: transcriptions or lab results) by the alphanumeric entries displayed in each column in the patient’s record.
To filter a column of data by keyword:
1. Identify the column you need to use to filter your list. Columns that have keyword filter capabilities display an empty dropdown box under the column name as shown in the example below.
2. Click the dropdown arrows on the right side of the box to view a full list of available keywords for the selected column.
3. Click the checkbox  next to the words you want to use to filter your list.
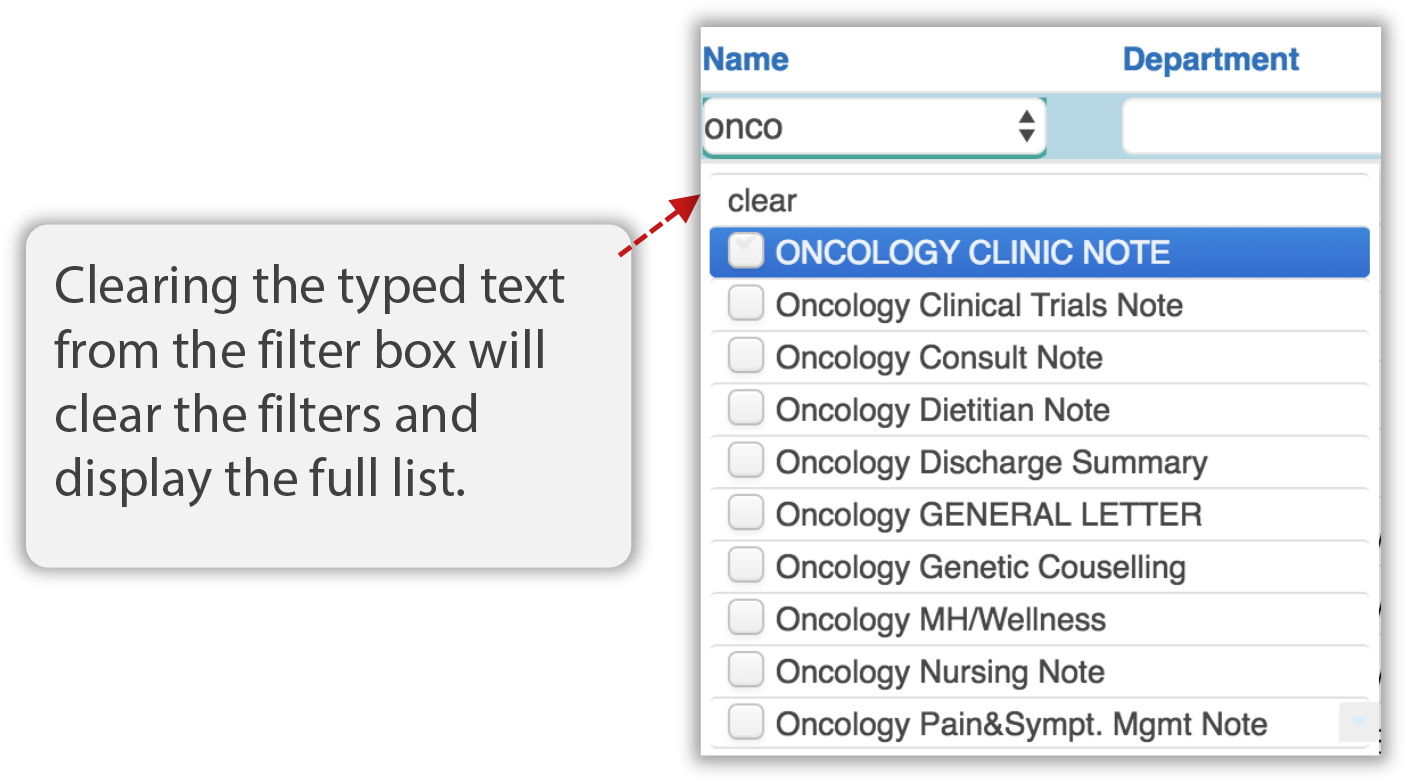
![]() You can also type text into the filter box to show matching keywords.
You can also type text into the filter box to show matching keywords.

The following image shows an example of text typed in filter box to only show available keywords that begin with onco (for oncology-related keyword matches).

The list will update to reflect the selections made in the column filter.
Example: Selecting GI Investigations in the Name column filter of the Transcriptions module will result in a list of transcriptions that include GI Investigations in the Name column.

4. You can use multiple keywords and multiple columns to filter your module list view.
Example: If you wanted to see all discharge summaries from a specific doctor (Dr. Europe) in the Transcription module, you would select (check) Discharge Summary in the Name column filter and Europe, Dornalee in the Dictated By column filter.

Clearing Keyword Filters
There are a few ways to modify or clear keyword filters depending on your data viewing needs.
Resetting the Entire Module
Click the Clear Filters button  in the module header to reset all filters in all columns. This will return the list view to display all rows based on your Encounters and Days Back settings.
This option is best used when you want to start from the beginning and apply new column filters in the module. This is also the easiest option if you want to view the module with your pre-defined original default preferences.
Example: After applying a number of filters in the module columns, you’d like to start over with new filter settings. Click the ‘Clear Filters’ button and reapply new filters.
Resetting an Entire Column
To reset (uncheck) all filters in a specific column:
1.Locate the column you want to reset then click the dropdown arrow on the right side of the filter box under the column header.

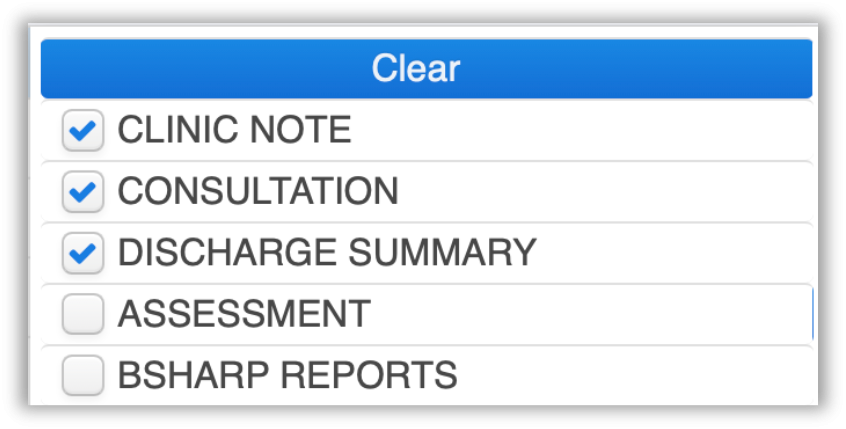
2. Click the Clear option at the top of the dropdown list. Your list view will update to reflect the changes to the column’s filter. This option is helpful if you want to make changes to the keyword selections for just one column.
![]() To remove individual keywords from your filter, uncheck the keyword you want to remove from the filter. This option is best if you want to make quick and simple changes to an existing filter selection.
To remove individual keywords from your filter, uncheck the keyword you want to remove from the filter. This option is best if you want to make quick and simple changes to an existing filter selection.

Example: If you have 10 different transcription keywords selected in the Name column of the Transcription module and now you want to select just Discharge Summaries. It’s easier to use the Clear option instead of individually unchecking all Oncology selections.
Printing Filtered Results
You can print the filtered list view results by clicking the Print button  after entering your column filters.
See Printing for more information on how to print list and detail views.
