Resource Centre - Expand and Collapse
 Return to Resource Centre
Video Tutorial
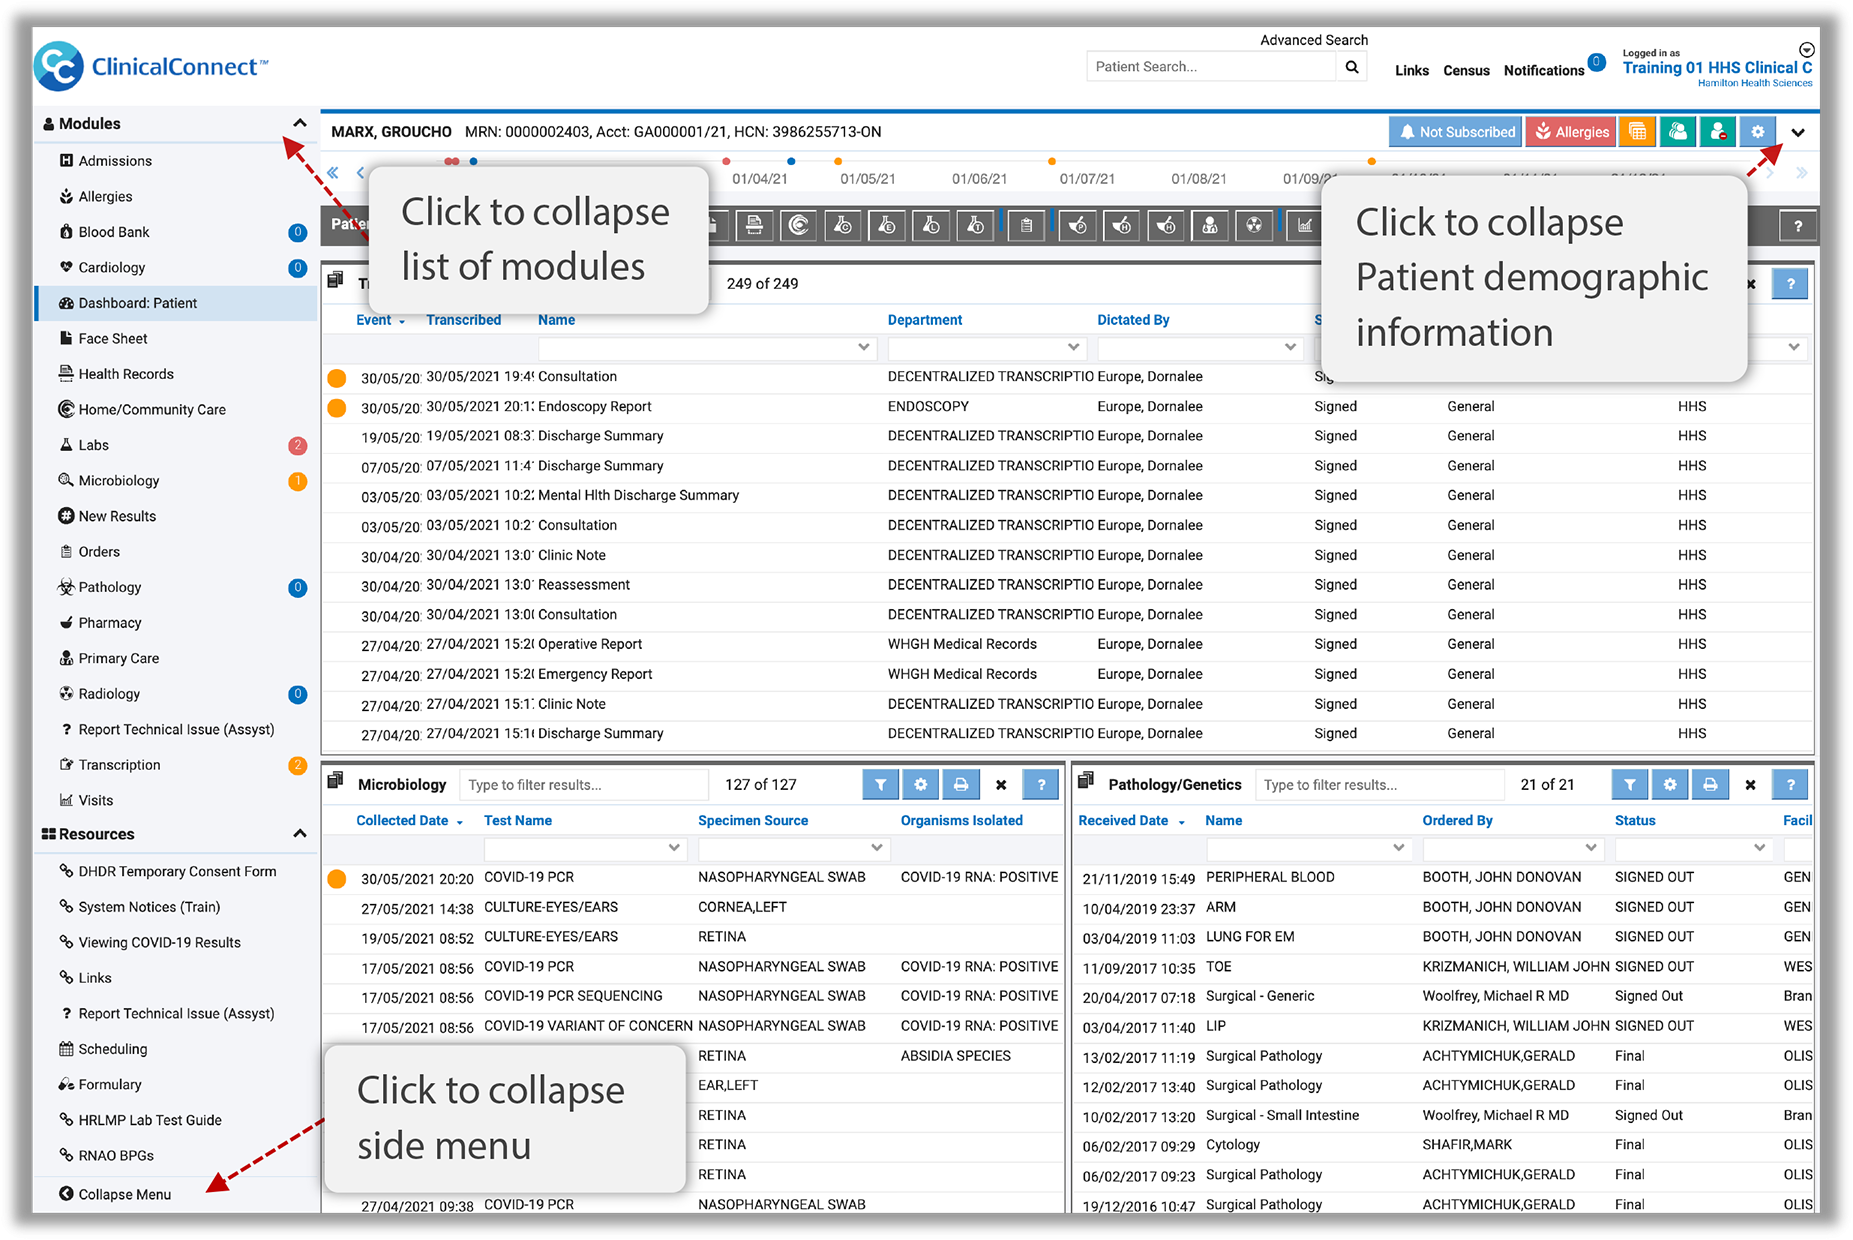
An easy way to make more room on your screen is to use the expand and collapse features on your user interface.
Patient Header Expand/Collapse
Clicking the expand/collapse button in the patient header allows you to show and hide the patient demographic information found in the header.
Expanded View:

Collapsed View:

Clinical Modules Expand/Collapse Menu
The module list panel on the left side of your screen can be collapsed horizontally by clicking the Collapse Menu option at the bottom of the panel. In the collapsed view you will no longer see the text titles associated with each item. Instead you will be able to click the module icon to access the module. New results flags are still visible in the collapsed view. To restore the modules menu, click the expand menu icon. The module list pane can also be collapsed vertically to hide the entire list as shown below.

To learn how to permanently hide your Patient Header and Clinical Modules menu, go to the page; Setting Your Patient Header and Patient Visits Timeline Preferences.
Module View Options
Some modules allow you to quickly minimize certain areas of the ClinicalConnect screen in order to make more room for module lists and details. You can also customize where your module lists and details are located on the screen.
Trailing Ellipses in Text Fields
In some case, columns of data may have long strings of text and will display with trailing ellipses indicating that there is more information available.
Click on the line item to view more details.

Viewing Record Details
You can change the layout of the list view and details view of a module to display in a side by side or top-bottom layout on your screen.
By default the module list view is shown on the top and the details are on the bottom. If you prefer viewing the details on the right side of the screen, click the Show the detail view to the right  button found on the module header. If you want to switch back to the default bottom view, click the Show the detail view at the bottom
  button.
Detail View on the Bottom:
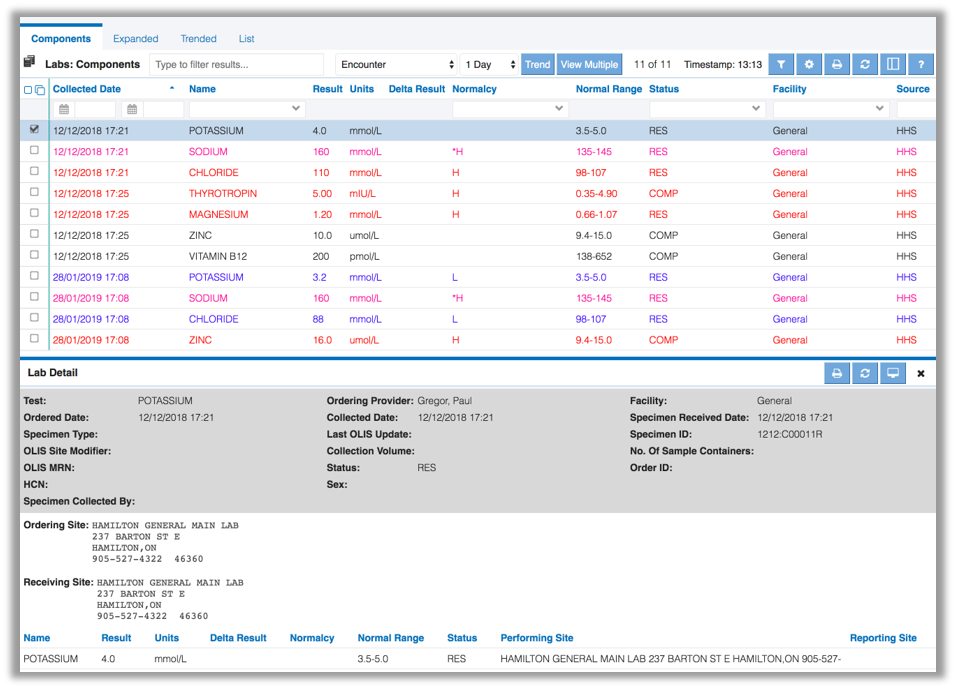
 More columns in the list view are a displayed when the detail location is on the bottom.
Detail View to the Right:
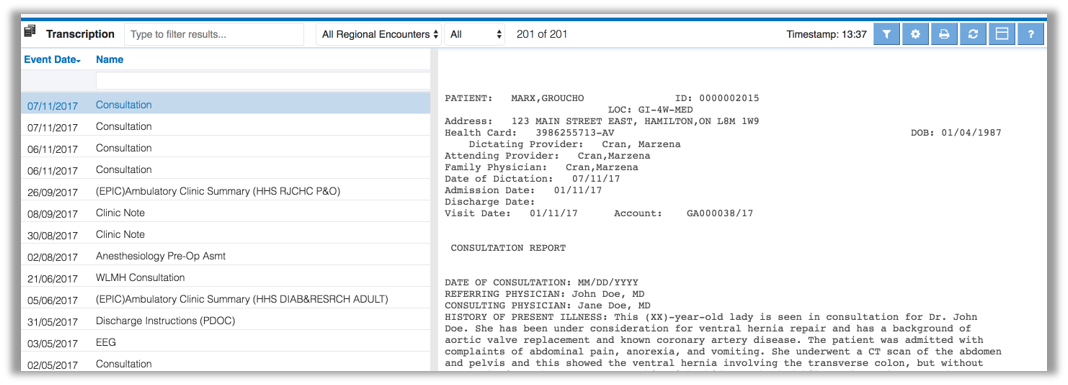
Different views display better in different modules. For example: the Labs module is easier to view with the detail view on the bottom, which makes it easier to view result details. You may prefer to view Transcription details with the detail view to the right which allows for quick scrolling through report types.
Both these settings can be configured in each module’s preferences:
1. Click the Preferences  button in the module header.
2. Use the Default Detail Location dropdown to select the view you prefer for that module.

3. Click the Save & Apply button.