Resource Centre - Radiology Module
 Return to Resource Centre
Video Tutorial
The Radiology module provides a list of the patient’s radiology studies and allows you to view diagnostic reports and images. Radiology images and reports are integrated from the Southwestern Ontario Diagnostic Imaging Network (SWODIN) and Ontario Health’s DI Common Service (DI-CS). Supported browsers: Internet Explorer 10+, Safari 6.0+, Google Chrome 20+ and Firefox 14+
New Result Indicators
If New Results are available, this module will be flagged  (Refer to New Results Module & Indicators for more details about new result settings).
 Reports from DI-CS and St. Joseph's Healthcare Hamilton currently, will not generate a new results flag in the Radiology module.
Diagnostic Imaging (DI) Common Service
ClinicalConnect users at participating organizations that have completed the necessary agreements with Ontario Health will have access to diagnostic imaging reports and images from Ontario Health's DI Common Service. This includes studies conducted at hospitals outside south west Ontario and by certain community-based diagnostic imaging centres from across the province.
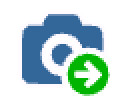
The DI Common Services reports already available from hospitals outside of South West Ontario in the Radiology module will now include the corresponding diagnostic images and will display the camera icon  beside the report line item as shown in the image below.
A list of hospitals and independent health facilities that contribute data to the DI Common Service is available from the Ontario Health site: https://ehealthontario.on.ca/connectingontario-data-summary/DICS_data_summary.html.
 Provincial repositories such as DI Common Services retrieve information based on the patient’s Health Card Number (HCN) match. In cases where a HCN is not available or invalid, data from the provincial repositories will not be accessible.
DI Common Service Reports and Images
Radiology reports and images display in a sortable list and will include reports and images from the provincial repository as shown below.

Types of Radiology Viewers
Radiology images display using the following viewers:
- GE Centricity Universal Zero Footprint (ZFP) Viewer - for SWODIN images contributed by all hospitals.
- Agfa XERO viewer - for images from DI Common Service.
Please refer to the reference guides below for more detailed information:
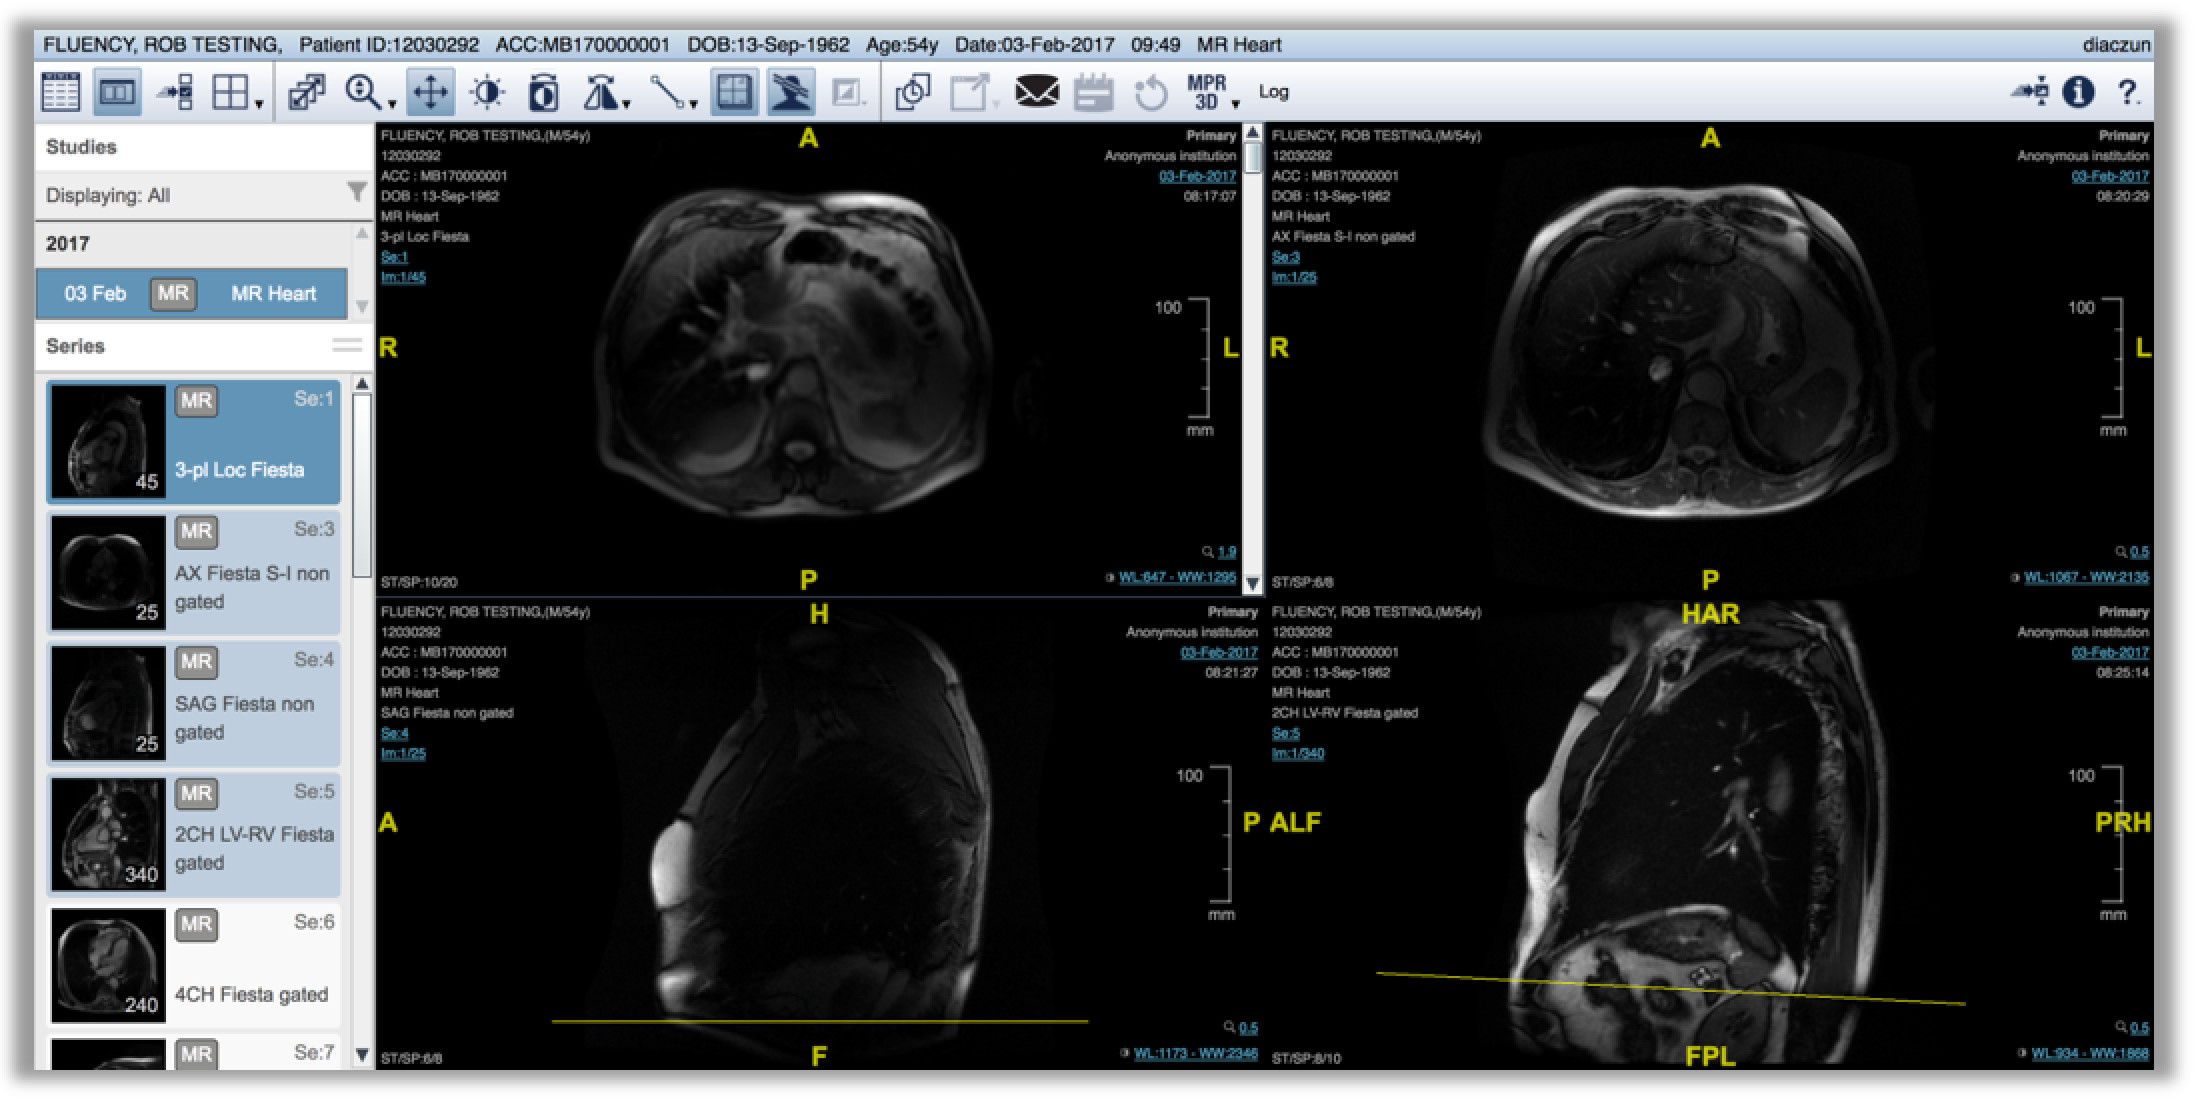
SWODIN Images - GE Centricity Universal Zero Footprint (ZFP) Viewer
The GE Centricity Universal Zero Footprint (ZFP) Viewer is used to view all SWODIN images and is approved for diagnostic use.
The complete GE Centricity Universal Zero Footprint (ZFP) Viewer guide can be access from the viewer’s Help icon . 
A quick reference guide is available from the following link: Radiology Image Viewer: GE Centricity ZFP Quick Reference Guide https://info.clinicalconnect.ca/CC/storage/documents/Quick guide ZFP viewer V6.0 S1.1.pdf
Ontario Health’s DI Common Service viewer : Agfa XERO Reference Guide
Radiology images from Ontario Health’s Diagnostic Imaging Common Service (DI-CS) repository use the Agfa XERO viewer. By default, all users are configured to use the viewer as a reference viewer and is not approved for diagnostic use. Full fidelity viewing is available only with the validated platforms and devices indicated as Full fidelity viewing in the Supported Browsers section of the Agfa XERO help function.
NOTE: The viewer is not intended for the display of digital mammography images for diagnosis.
If you attempt to view images in full fidelity mode using an unvalidated platform, an Unvalidated platform warning is displayed  . You must either accept or decline the warning before continuing.
To access the AFGA help function and the technical specification resources, click on the Help, located at the top the screen as shown below. If you would like to learn more about using Agfa XERO, use the Quick Start Guide.

DI Common Service and Consent Directive
A patient has the right to withdraw consent to access and use of their full or partial records from DI Common Service through the current Ontario Health process. ClinicalConnect will honour consent restrictions and display the following message in the patient’s ClinicalConnect record:
There is a consent directive in place for the selected patient
Clinicians may contact Ontario Health's Service Desk Support at 1-866-250-1554 or email at OH-servicedesk@ontariohealth.ca.
The following table provides a summary of some of the key features of the Radiology module.
| Preference | Description |
|
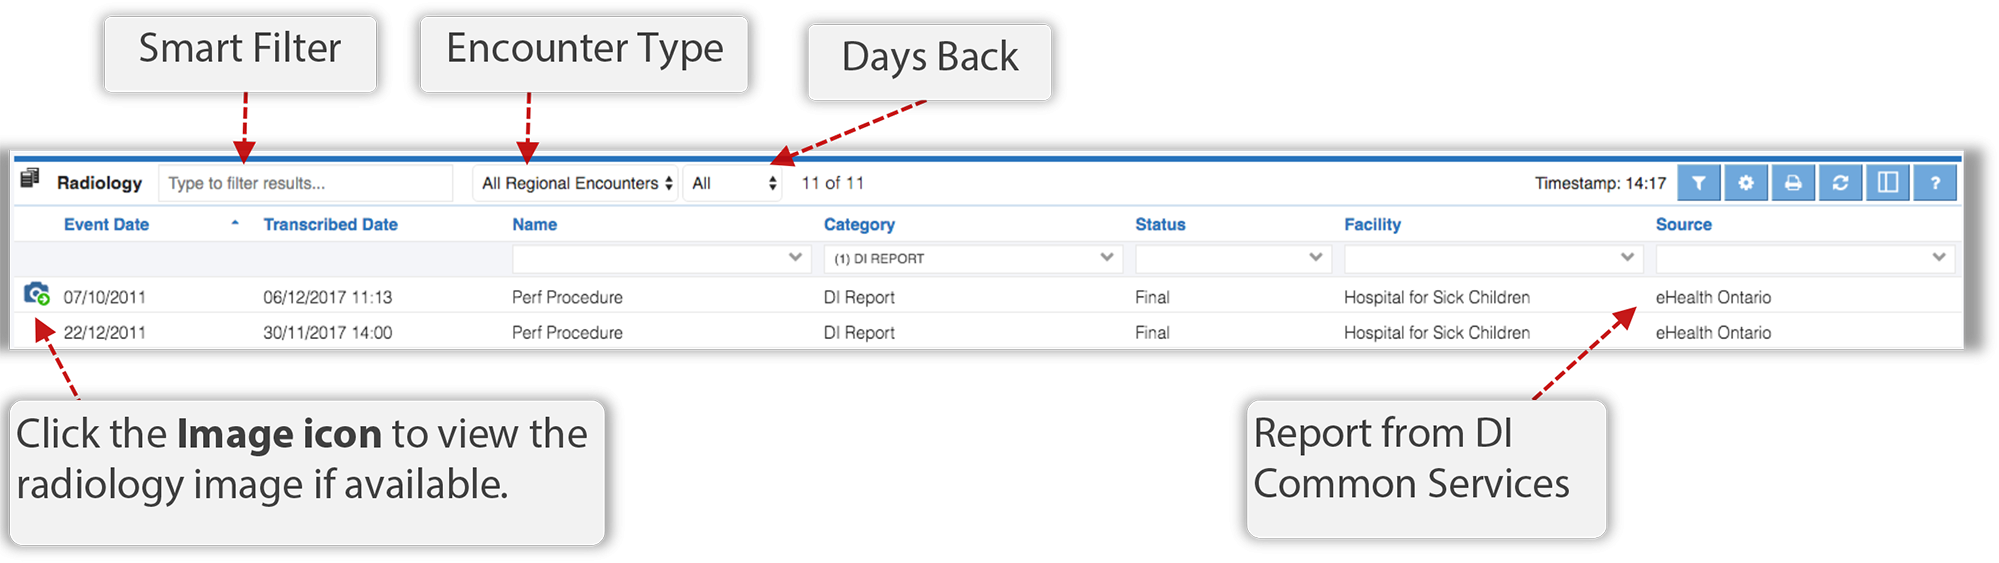
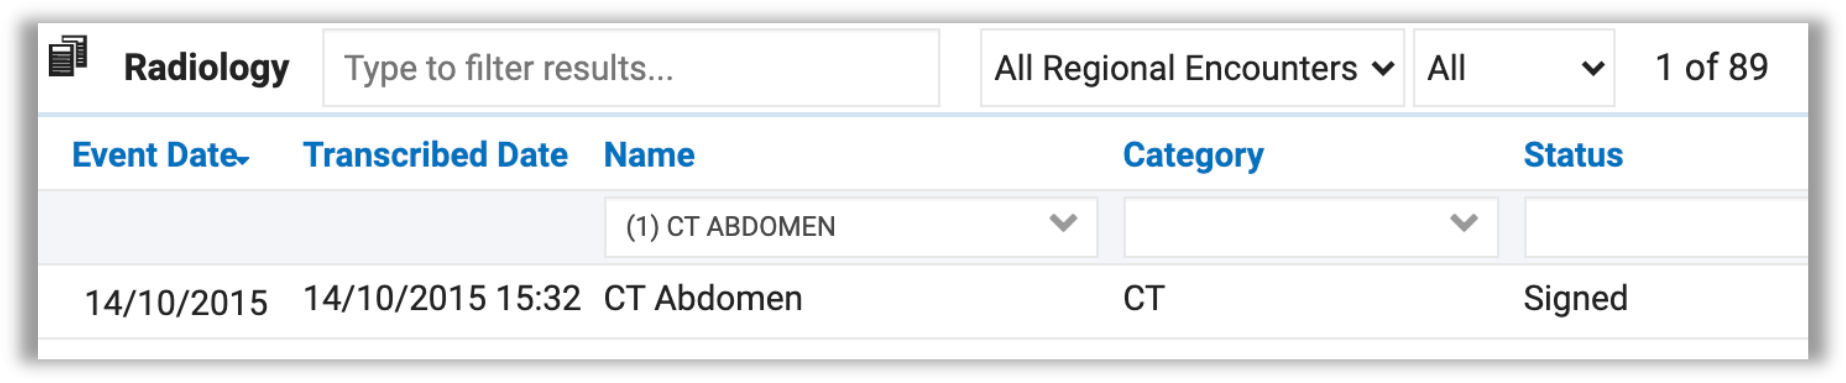
Smart Filter |
The Smart Filter is used to narrow down the list of radiology results to display only those related to the text you entered in the filter. Example: ct hhs is entered in the Smart Filter box. The Smart Filter searches the Radiology List grid for any row that contains text that begins with both ct AND hhs. All other orders are filtered out and do not display in the view. Only one result was found for a CT Abdomen from HHS.
|
|
Encounter Type |
The Encounter Type filter is available in select modules and by default, is set to All Regional Encounters in order to view data from provincial repositories. Options include:
|
|
Days Back |
The Days Back filter refers to the amount of information presented in the view based on the number of days back from the date of patient discharge. For an admitted in-patient, the Days Back filter refers to the number of days back from the current date (today).
Make sure that your Days back is set appropriately to include the available data in that date range. Example: If you’re looking for a result that was completed two weeks ago, and the Days Back is set to 7 days, then you will not be able to see that result. |
|
Image Icon
|
Reports with images will have an Images icon |
Viewing Radiology Details
Radiology results are displayed in a sortable list. Click the row of the result you want to view to see the report details.
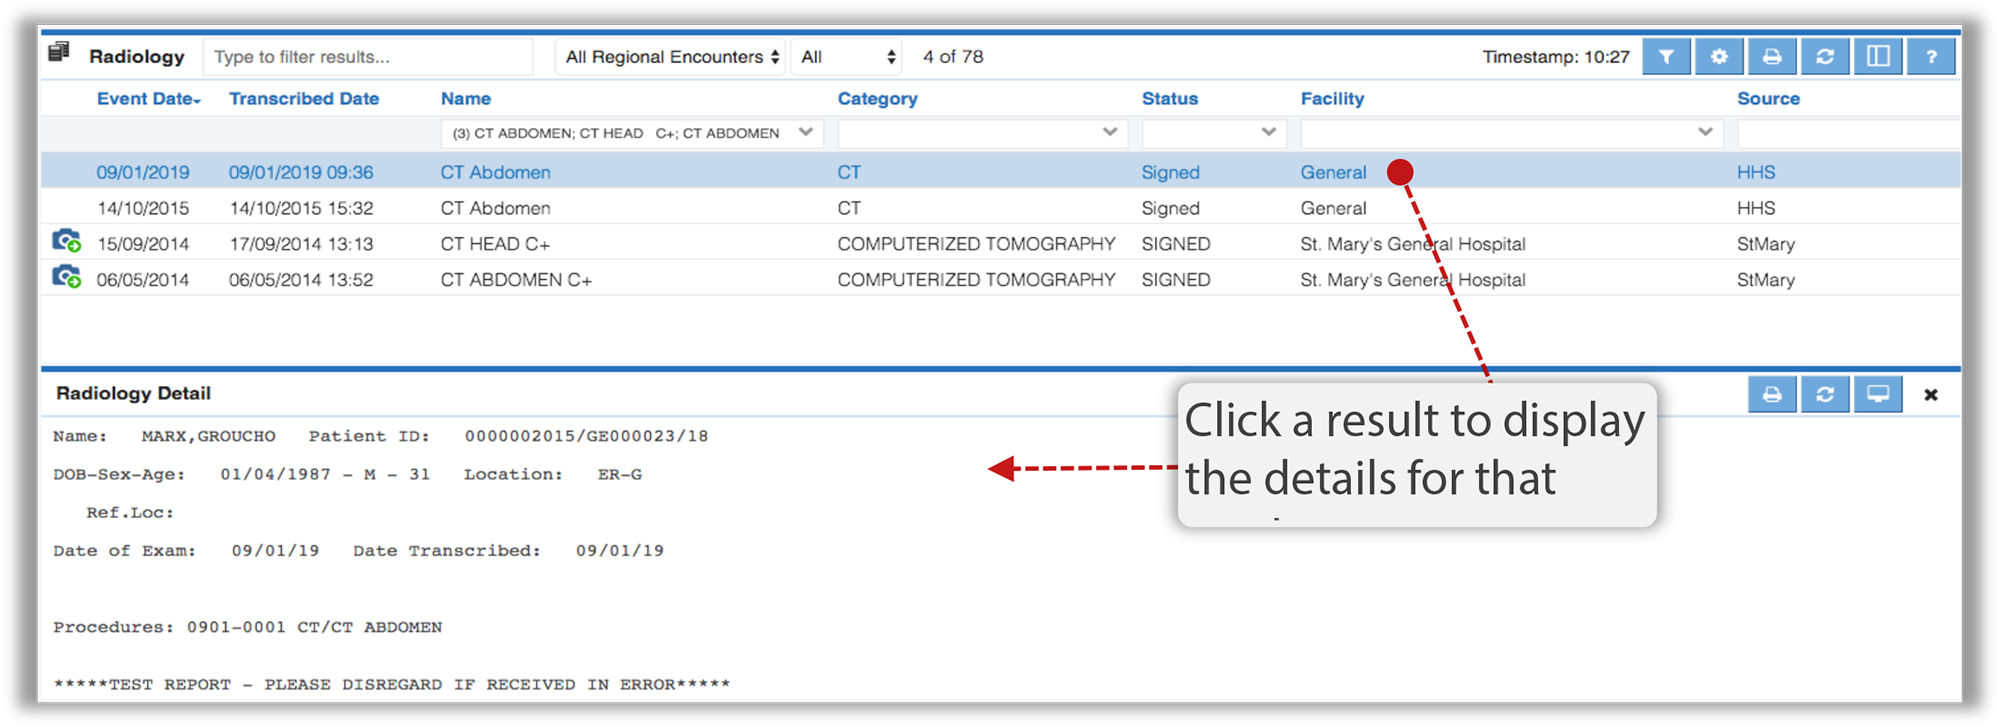
Depending on your preference settings, the Radiology Details will either show up to the right of the results list or below the results list.
Printing Radiology Results and Details
Printing from some ClinicalConnect modules creates a PDF document which indicates that you have generated a medical document which should be treated as confidential. The page is watermarked with the ClinicalConnect logo and identifies your name, the date, and time the document was generated.
To print Radiology results or details:
1. Click the Print button  found in the Radiology header or details window of the screen you want to print.
2. Use your browser’s document viewer to complete the printing process.

Printing options vary depending on browser and location. Check with your technology team if you’re having issues printing information from ClinicalConnect. Adobe Reader 10.1.4 or higher is recommended to view records presented as PDFs in ClinicalConnect.
Viewing Radiology Images
 Images may not be available for all reports presented in the module list and do not display the camera icon. SWODIN images need to be launched outside of Citrix in some corporate environments that do not support a compatible browser.
To view radiology images:
1. Click the camera icon

2. A new browser window or tab will display the imaging in the viewer window.
Grouped Multiple Images
In some cases, source hospital systems that contribute radiology images may have grouped multiple images from multiple exams (including multiple exam types) under one exam if those exams were completed on the same day. Each exam will be listed in the Radiology module with a camera icon but may not contain the associated exam image.
Example: Nuclear Medicine Studies
Click the thumbnail of the desired image series. (SC prefix mnemonic indicates screen capture)

It is recommended to look for other reports from the same day and launch the camera icon to review the grouped images:
Example:
- Enter the date of the exam in the Radiology Smart Filter text box using the DD/MM/YYYY format. All results from that day are displayed in the Radiology results list.
- Click each camera icon to view image results until you find the images you were looking for.

Radiology Preferences
The Radiology module has it’s own set of preferences that can be accessed and configured by clicking the Preferences button  in the module header or by using the Preference Setup Wizard.
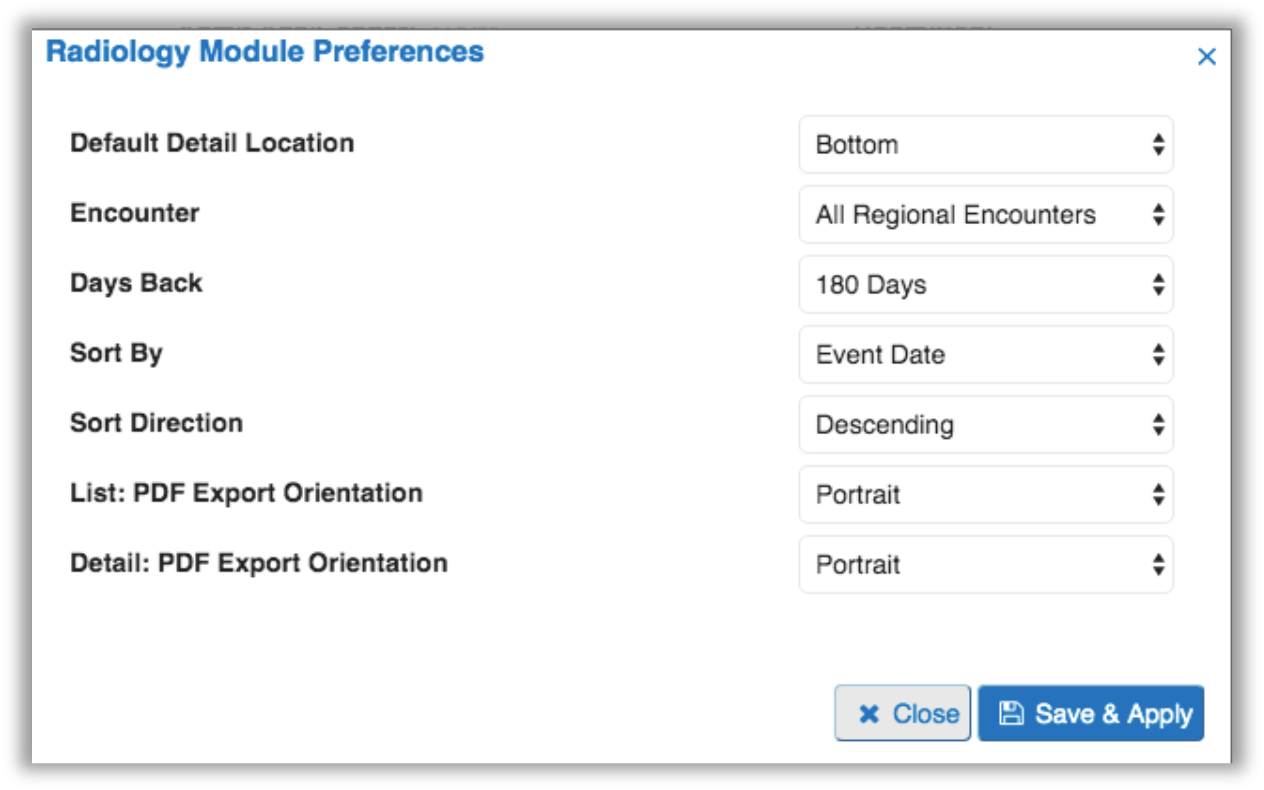
After updating your preference settings, click the Save & Apply button to save your changes.
To learn more about the various preference setting options, please visit the Common Preference Settings in ClinicalConnect section.