Resource Centre - Notification Subscriptions for New Results
 Return to Resource Centre
Video Tutorial
Authorized users with full web access to ClinicalConnect have the option to subscribe to receive email notifications when new results become available in the patient’s record for select modules. Currently, this functionality is not available to users at select organizations who are set up to launch ClinicalConnect only from their clinical information system (called Contextual Launch Only/Restricted Contextual Launch).
Notifications can be set up for each patient individually, at the module level and for a preferred frequency. The Lab module notifications can be further customized to send emails only if the results are abnormal. You can add your preferred email address where you’ll receive new result notifications for the patients that you have subscribed to.
These real-time email notifications may be useful in various clinical settings, supporting clinical workflows where clinicians may be waiting for hospital-based results for their patients in order to make a clinical decision or to provide follow-up care.
Important Notes: Understanding How New Result Notifications Work
This notification functionality is built on the existing New Results module which is limited to aggregating new results from direct data integrations from select acute care hospitals in south west Ontario and based on the user’s New Results preference settings. Provincial repository data does NOT support the New Results/Notifications feature.
Results are determined to be “new” based on your individual Preference settings as described in the New Results page and are flagged as “new” up to a maximum of 72 hours back from your current log in and for those results that you have not already viewed within your set parameters.
 The Notification Subscription to receive email alerts that New Result(s) are available in select modules and from select source systems, only applies to a patient’s subscribed encounter which is associated with their Medical Record Number (MRN) or equivalent. If the patient has encounters at additional facilities with different MRNs, you need to select and subscribe to all applicable MRNs that you wish to receive notifications of new results for.
It is also important to be aware that New Result notifications only apply to data that is available from select acute care facilities in south west Ontario and will not include notifications for data from provincial repositories, Home/Community Care Services, or for patient encounter records where the Source system is identified as “eHealth Ontario”.
Note: In some cases, Hospitals may not flag new results for all modules. Please refer to the Integration Status Chart to see the hospitals that flag New Results.
Notification Subscription Email
You will receive email notifications from ClinicalConnect alerting you of new results for the patients that you have subscribed for and based on your defined frequency and the modules you selected for each patient.
The email notification details will not contain any Personal Health Information (PHI) for the patients you’ve subscribed but will include a generic link that will launch the ClinicalConnect log in page, requiring you to log into ClinicalConnect first before accessing your Subscription Notification list of patients to view the available new results.
ClinicalConnect will aggregate any new results available for each subscribed patient and will send one email notification for all patients based on your defined frequency value, rather than sending multiple emails for each new result.
This is an example of the email notification you’ll receive.
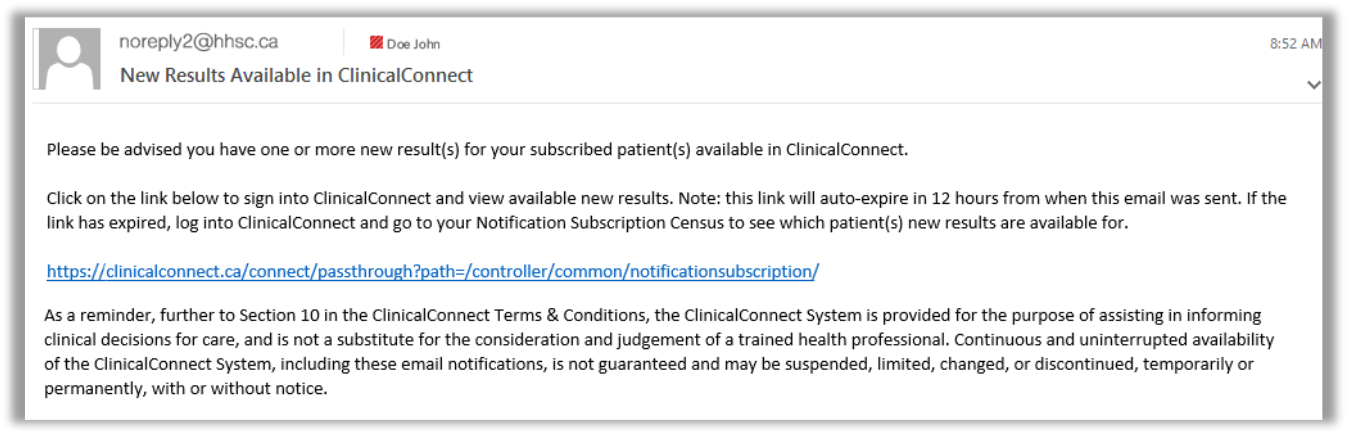
The link will auto-expire in 12 hours from when the email was sent. The following message will display in the header if the link is expired:

You can still review your patients New Results by accessing their record.
How to Set Up a Notification Subscription
1.Patients who you have not yet subscribed to receive notifications will display the Not Subscribed button located in the patient header. To subscribe to this patient, click the Not Subscribed button.

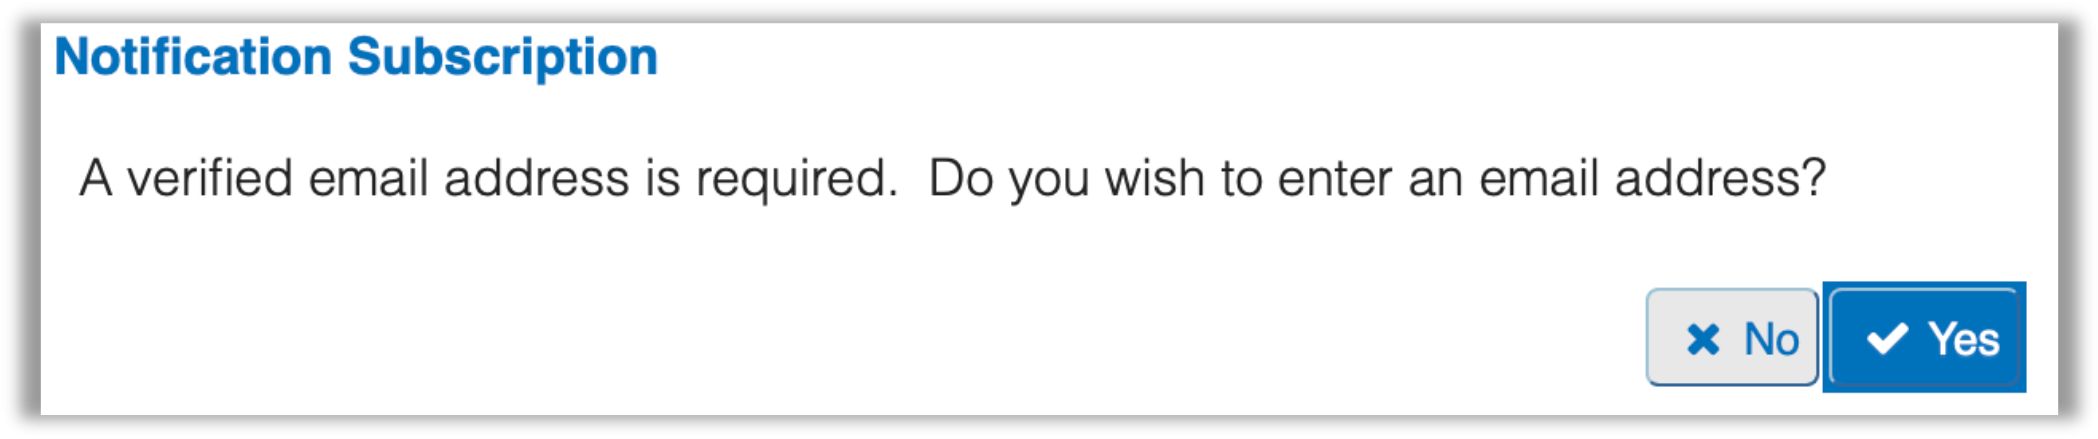
2. When setting up a Notification Subscription for the first time, you will be prompted to add and verify your email address before you can continue to set up your notification preferences for the patient you selected and ClinicalConnect will prompt you to complete this as shown below. Click Yes to setup your notification subscription preferences.
 You must have at least one module enabled for New Results flags to be able to complete the next step in your Notification Subscriptions. If no modules are enabled for New Results then the message shown below will display when clicking the Not Subscribed button, reminding you to enable this in the New Results module preference settings.

To enable your New Results click the Preferences  button in the New Results module and modify your preferences or change your New Results preferences using Step 8 of the Preference Setup Wizard.
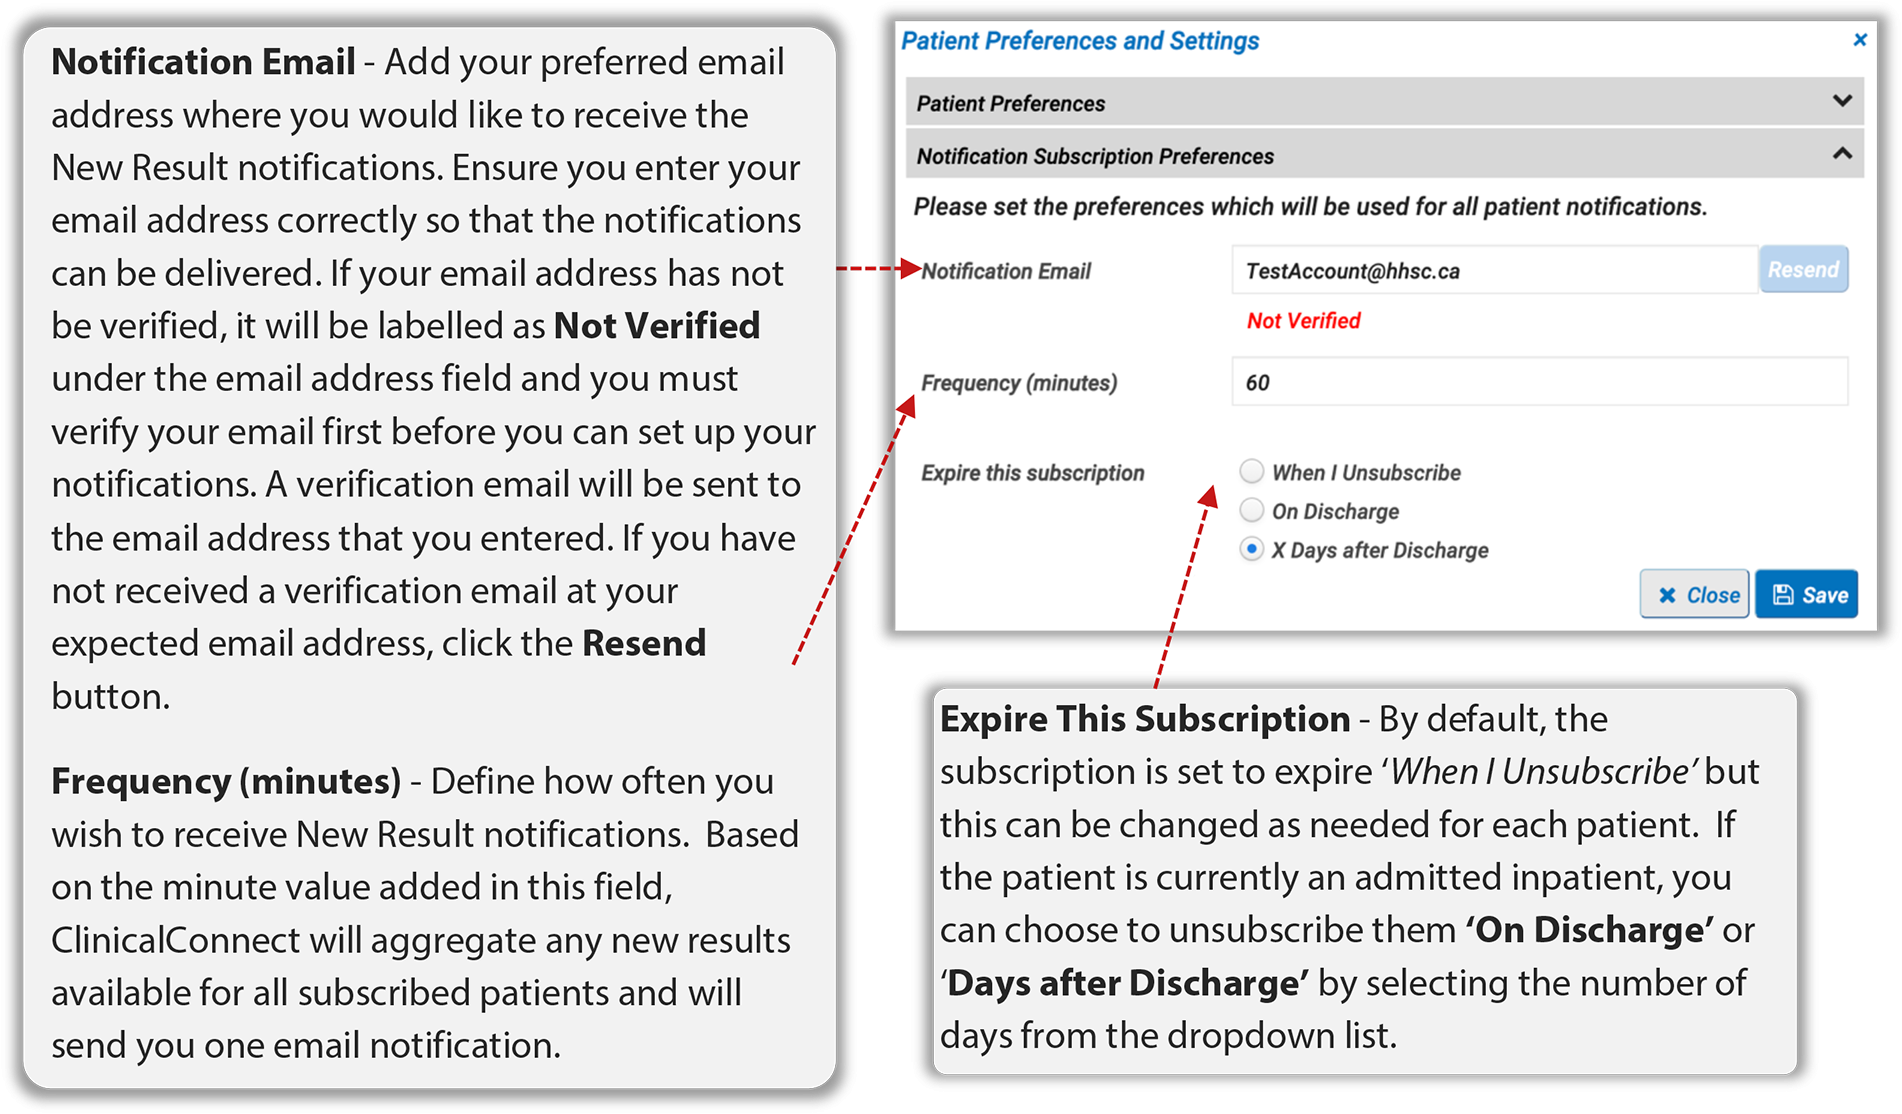
3. If this is your first subscription, you will need to define your general Notification Subscription Preferences, such as your email, your notification frequency and expiry. These general preference settings will apply to all notifications for all patients that you subscribe to. If you have previously already set your notification preferences, you will not need to complete this step.
4. After completing this step, which will apply to all notifications for all patients that you have subscribed to, click the Save button to move to the next step.
5. A confirmation email will be sent to the email address that you submitted. Click Continue to have the email sent to you.

A verification email will be sent to the email address that you entered. The link will auto-expire in 12 hours from when the email was sent. To verify your email, click the link provided in the email and log into ClinicalConnect. This will bring you to your default census view and will display the message Email address is verified.
You must make sure your email address is verified before you can continue to customize your Notification Subscription settings for any selected patient.

If you did not receive the verification email, please check your email spam filters.
You are now ready to select the modules that will apply to the New Result notifications for this patient. Click the Not Subscribed button located in the patient header. This screen allows you to select the notification modules for each individual patient by selecting some or all of the modules from the Notification Subscription Settings window as shown below.

6. The next section is specifically related to Lab notifications. To set up Lab notifications, expand the option for New Results Lab then select whether you want to receive an email notification for ALL new Lab results or just new Abnormal Lab results for this patient.

Please review the section called Important Notes: Understanding How New Result Notifications Work provided in this guide to ensure you understand the limitations of the new result notifications.
7. The next section is called Expire this Subscription and it is used to define when you want this subscription to expired for this specific patient. These are the same expiry values as shown earlier in step 2 and will default to what you selected when you first completed your notification preferences. You have the option to change your subscription expiry by expanding this section and make the changes as needed.

You cannot select On Discharge or number of Days after Discharge if the patient is already discharged and the following notification will display. You must close the message window and leave the expiry selection to ‘When I Unsubscribe’.

8. Once you’re finished setting up the subscription, click the Save button to create the notification subscription. You also have the option to Unsubscribe the patient.


Once you have completed the subscription, the patient’s header will now display the Subscribed icon. Clicking this icon will take you to the patient’s subscriptions where you can modify or unsubscribe as needed.

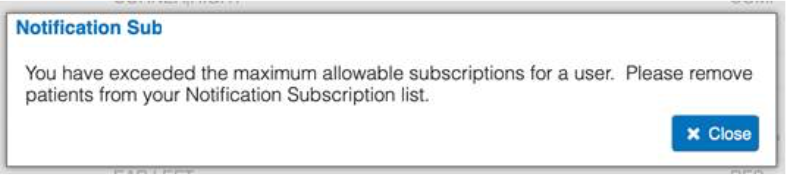
You can only be subscribed to a maximum of 75 different patient MRNs. If you try to exceed the maximum number of notification subscriptions, you will receive this message:
Accessing your Notification Subscription List of Patients
After subscribing to receive notifications for at least one patient, you will be able to access the Notification Subscription tab where all of your patients’ subscriptions will be listed as shown below. You can easily manage all of these subscriptions from this view or select the patient’s record to view their New Results. From this list you can easily select the patient’s record to view their New Results or edit/remove the subscriptions as needed.
1. To access the Notification Subscription list when in a patient’s record, select the Census link from the top of the screen.

The Edit  button can be used to modify your notification subscription settings.
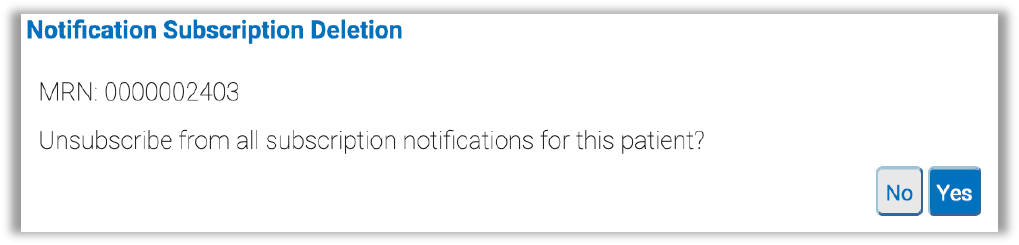
The Unsubscribe  button will unsubscribe you from receiving email notifications for the selected patient and will display a confirmation message when deleting the subscription as shown below. Verify that you want to unsubscribe from notifications for the selected patient by clicking Yes. By clicking No you will return to your Notification Subscription list.
After unsubscribing a patient, you will no longer see them listed in your Notification Subscription list and you’ll have to click the Not Subscribed button in the patient header to subscribe again.
Notification Subscriptions Tab Preferences
The Notification Subscriptions tab has its own set of preferences that can be accessed and configured by clicking the Preferences button in the module header.

After updating your preference settings, click the Save & Apply button to save your changes.
To learn more about the various preference setting options, please visit the Common Preference Settings in ClinicalConnect section.