Resource Centre - Preference Setup Wizard
Video Tutorial
Setting up your personal preferences is essential to how you view information in ClinicalConnect. Due to the large volume of data that is queried from multiple facilities, it is important to configure your preference settings to ensure you’re getting the results you need. ClinicalConnect provides a standard set of default preferences for new users when first accessing the portal however, you may want to customize these default preference settings to better align with your clinical needs. The new Preference Setup Wizard will guide you through how to set the values associated with how you prefer to view and retrieve data while using ClinicalConnect. The Preference Setup Wizard should be used to configure your ClinicalConnect preferences when accessing the portal on desktop and mobile devices, as well as when using the Patient Dashboard. Existing users will need to set and save their preferences using the Setup Wizard to ensure that their previously-selected default preferences remain the same as before for all three views as now each view has its own preference settings to choose from.
In addition, it’s very important that in each of the three modalities:
- The Encounter Filter be set to “All Regional Encounters” (Step 1 of the Setup Wizard) to ensure data from provincial repositories is viewable (assuming your organization has been enabled to view such data).
- The Days Back Filter should be set to an appropriate number of days (Step 2 of the Setup Wizard).
- Note that the Encounter and Days Back options should be set using the Preference Setup Wizard for the Patient Dashboard to ensure that the Dashboard modules display the desired amount of data. You can also set and save the module preferences in your Dashboard individually by using the preference
 icon.
icon.
 Should you need to change your preferences in the future, you can use the Preferences option within each module and Census List, or you can return to this Wizard by clicking on your name in the top right corner of the screen and selecting ‘Preference Setup Wizard’ as shown in the image to the right. Use the “Go to Step” button within the Wizard if you only need to update certain aspects of your preferences as opposed to going through the entire Setup Wizard. Always click Save & Continue for your preferences to take effect.
The Preference Setup Wizard will present automatically upon your first log in after August 15, 2020 or can be accessed anytime thereafter from the user menu, Preference Setup Wizard.
- To access the Preference Setup Wizard, open the user menu by clicking your name in the top right toolbar.
- Click Preference Setup Wizard
The Preference Setup Wizard will guide you through nine steps of the preference set up screens. After completing each step, you must click Save & Continue then once you’re finished, ensure you log out of ClinicalConnect and the next time you log back in, your new preferences will take effect.
- To start customizing your preferences, click the Begin button from the welcome screen.

Each step of the Preference Setup Wizard contains two sections that relate to Desktop, Mobile or Dashboard modalities.
1. The top section of the Preference Setup Wizard allows you to apply the same preference settings to all applicable modules at once for Desktop, Mobile, or Dashboard by clicking the Dropdown arrows for each heading.
2. The lower section of the screen allows you to further customize the module by selecting a specific Tab (i.e. Desktop, Mobile or Dashboard) first and then choosing the specific module(s) to customize for each tab. This may be used in cases where you may want to view data differently between Desktop, Mobile and the Dashboard.

 Not all steps of the Preference Setup Wizard may apply to all three views (Desktop, Mobile, and Dashboard) as available options. In addition, the module preference options may not all be the same for all three modalities and in this case, you will receive this message: Unable to apply the selected preference to all module preferences listed below.
The modules that require you to select a different value will be highlighted in red. Using the drop downs, select a different value then click Save & Continue.
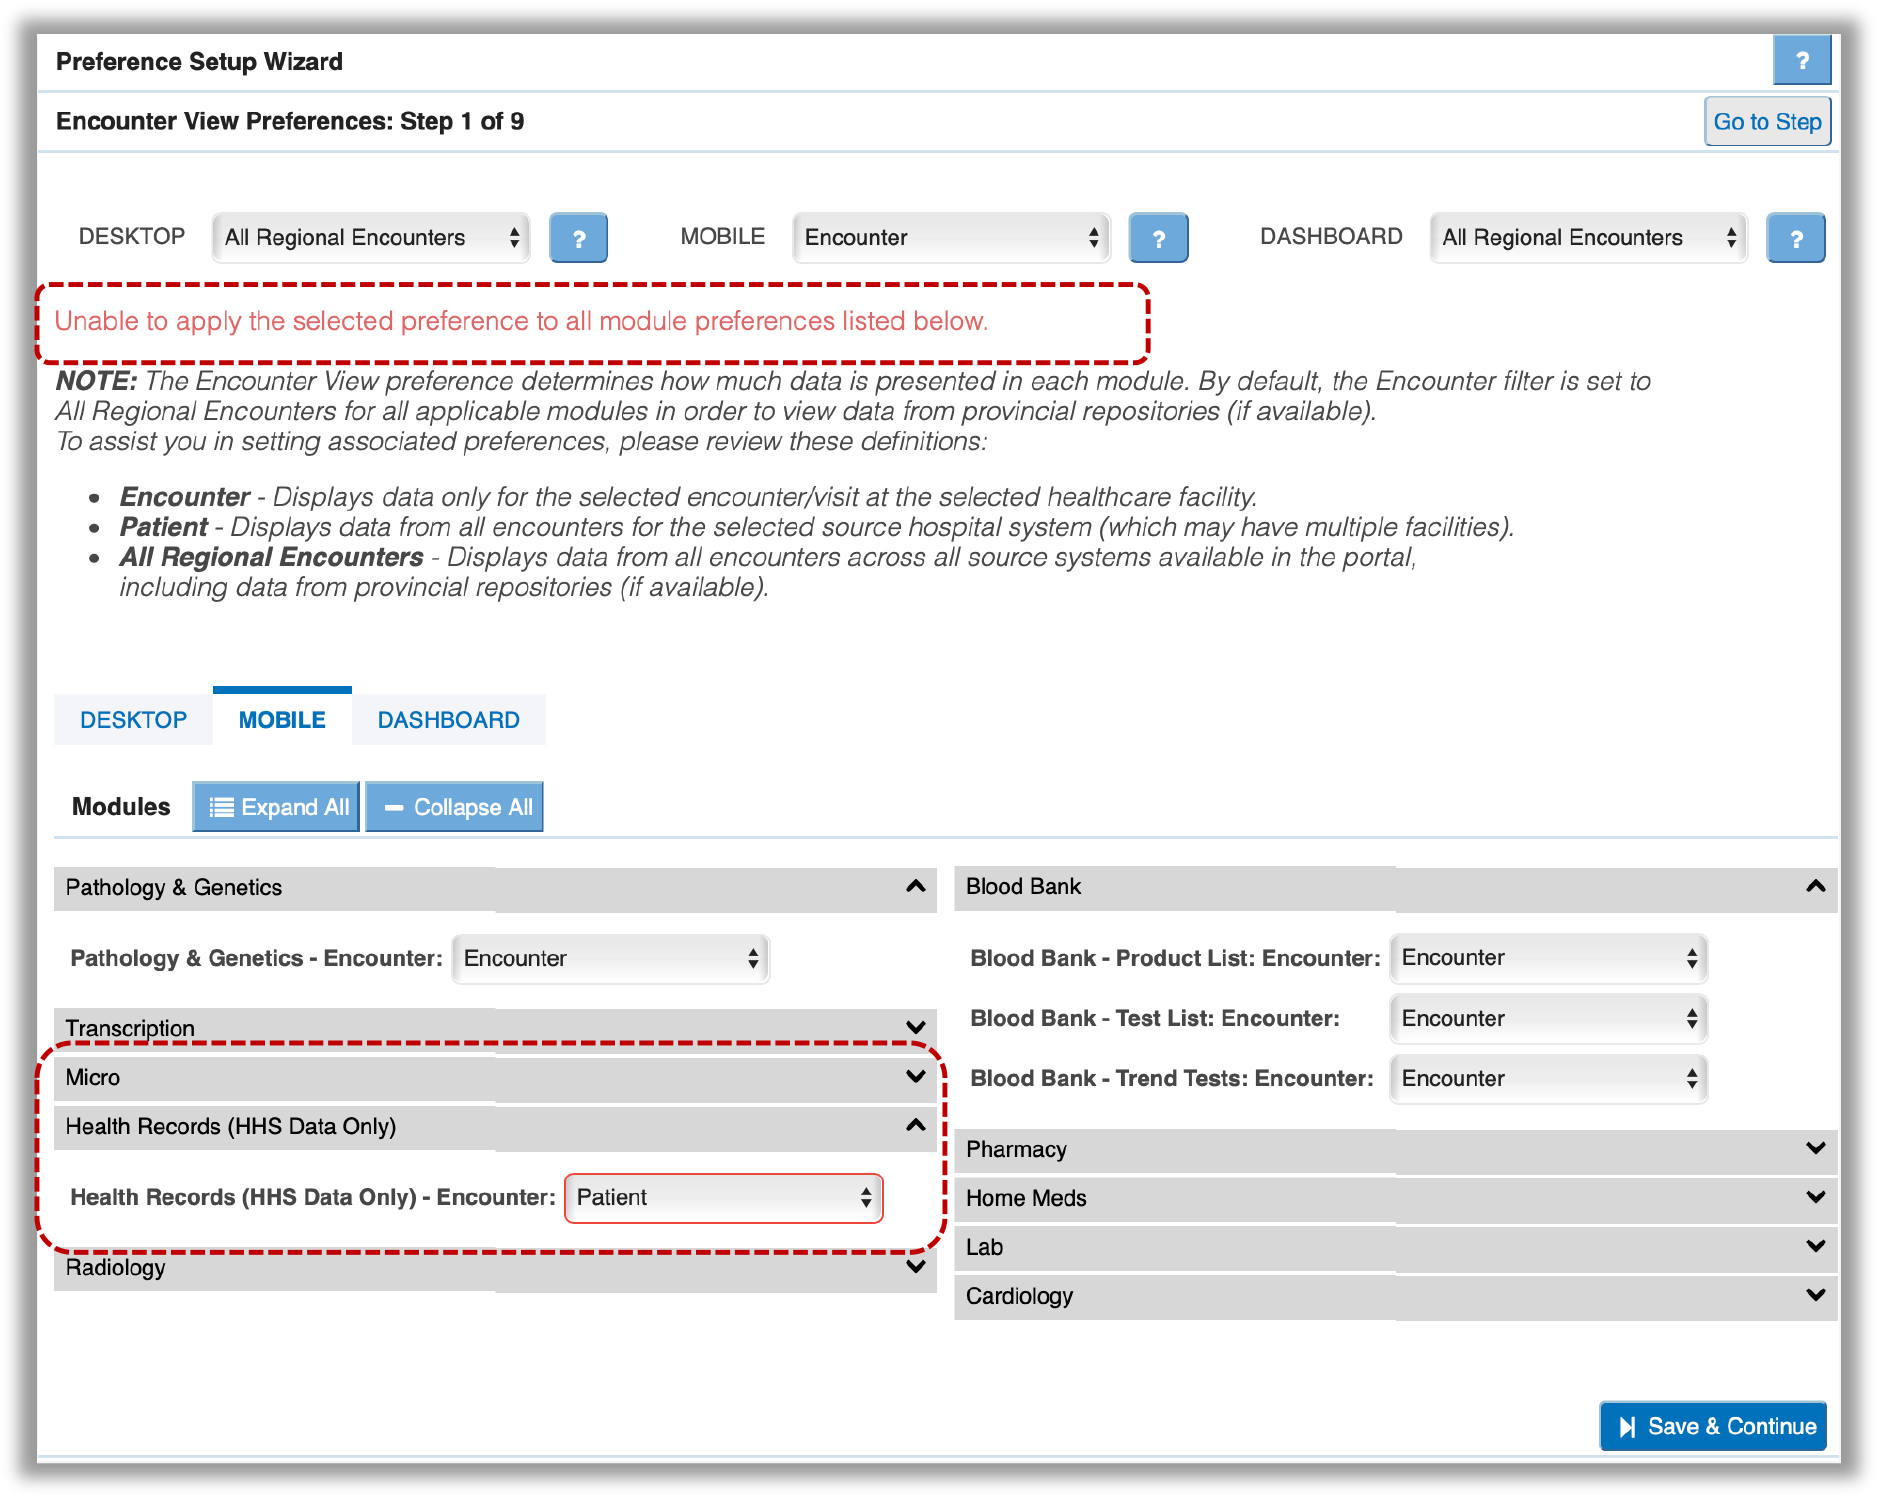
3.To apply individual preferences to each of the modalities, first click on the tab you wish to customize: Desktop, Mobile, or Dashboard.
You can change the preference settings for a specific module by clicking the Dropdown arrow and selecting an option.

4. The modules and the preference options will display in an expanded view, clicking the Collapse All  button collapses the long list of preferences down to just the module titles, making it easier to find the preferences you want to update. Clicking the Expand All
  button will list the full view of all available modules and the preferences.
5. After completing your preference selections click Save & Continue to proceed onto the next step. If you would like to go back a step, click the Back  button
To go to a specific step in the Preference Setup Wizard, click the Go to Step button in the top-right corner of your screen then select the desired step from the drop-down list.

Setting Up your Preferences Using the Setup Wizard
There are nine steps in the Preference Setup Wizard that are described in more detail below
Step 1 - Encounter View Preferences
The Encounter preference determines how much data is presented in each module. By default, the Encounter filter is set to All Regional Encounters for all applicable modules when viewing data on a desktop, mobile device or from the Patient Dashboard to ensure data from provincial repositories is viewable (assuming your organization has been enabled to view such data). (if available). The three Encounter preference options are:
- Encounter - Displays information only for the selected encounter/visit at the selected healthcare facility.
- Patient - Displays data from all encounters for the selected source hospital system (which may have multiple facilities).
- All Regional Encounters - Displays data from all encounters across all source systems available in the portal including data from provincial repositories (if available)
![]() Note that the Encounter options should be set using the Preference Setup Wizard for the Patient Dashboard to ensure that the Dashboard modules display the desired amount of data.
Note that the Encounter options should be set using the Preference Setup Wizard for the Patient Dashboard to ensure that the Dashboard modules display the desired amount of data.

Step 2 – Days Back Preferences
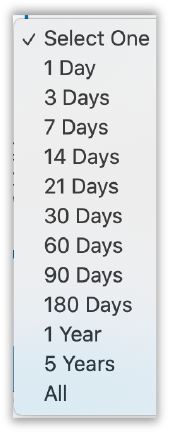
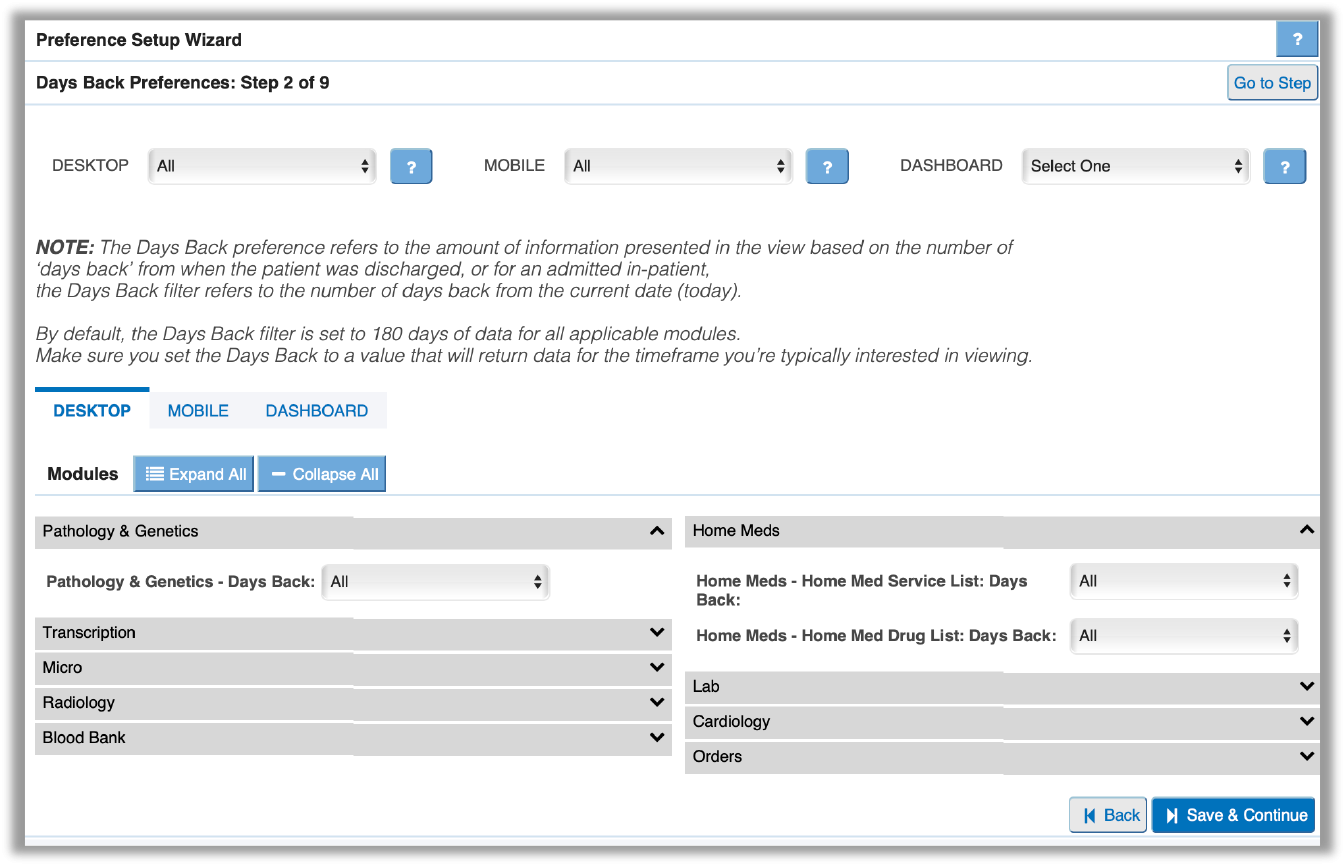
The Days Back preference refers to the amount of information presented in the view based on the number of ‘days back’ from when the patient was discharged, or for an admitted in-patient, the Days Back filter refers to the number of days back from the current date (today).
By default, the Days Back filter is set to 180 days for most modules when viewing data on desktop. Make sure you set the Days Back to a value that will return data for the timeframe you’re interested in viewing when using a desktop or mobile device or from the Patient Dashboard.
Step 3 - Patient List Preferences
The Patient List preference allows you to set the number of Days Back specifically for your Patient Census Lists and can be set differently for Desktop or Mobile use by selecting each tab at the top of the page then selecting the Days Back options. The Census List, Days Back filter can be set to a maximum of 14 days back.

Step 4 - Detail Location Preferences
The Detail Location preference determines where details related to the data in each module display in ClinicalConnect on desktop devices.
- Bottom – Data/details display below the results/reports list.
- Right – Data/details display to the right of the results/reports list.

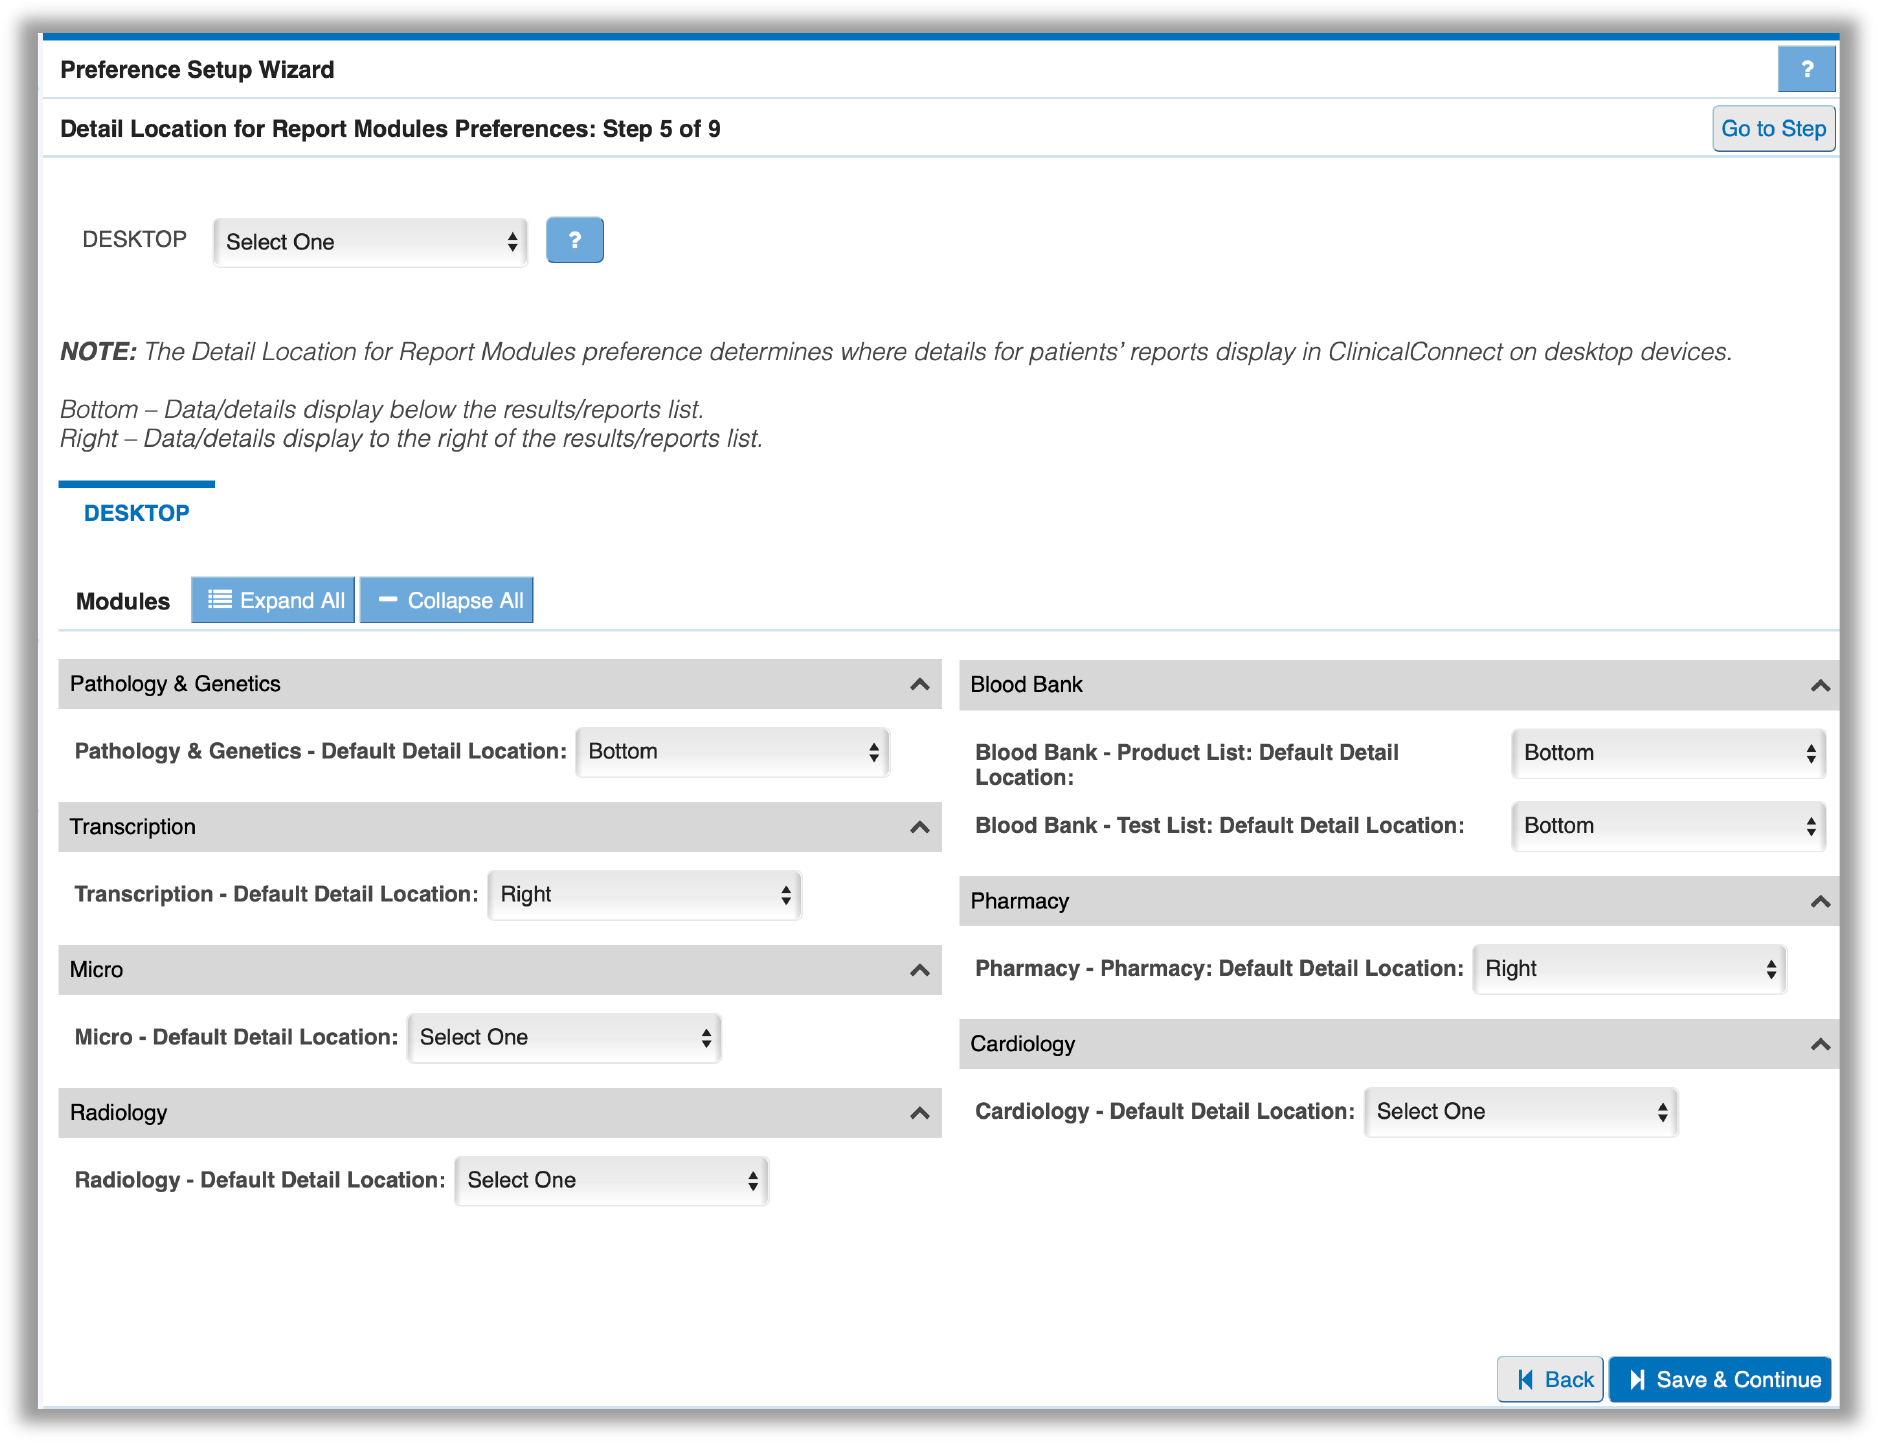
Step 5 - Detail Location for Report Module Preferences
The Detail Location for Report Modules preference determines where details for patients’ reports display in ClinicalConnect on desktop devices.
- Bottom – Report details display below the results/reports list.
- Right – Report details display to the right of the results/reports list.
Step 6 - List PDF Orientation Preferences
The List PDF Orientation preference allows you to configure the orientation of PDFs when exporting lists of reports/data, to save or print from each of the modules listed below. Options include Portrait or Landscape orientation. This option is only applicable to the Desktop and Dashboard modalities.

Step 7 - Detail Location for Report Module Preferences
The Detail PDF Orientation preference allows you to configure the orientation of PDFs when exporting the details of the reports found in the modules listed below. Options include Portrait or Landscape orientation.
This option is only applicable to the Desktop and Dashboard modalities.

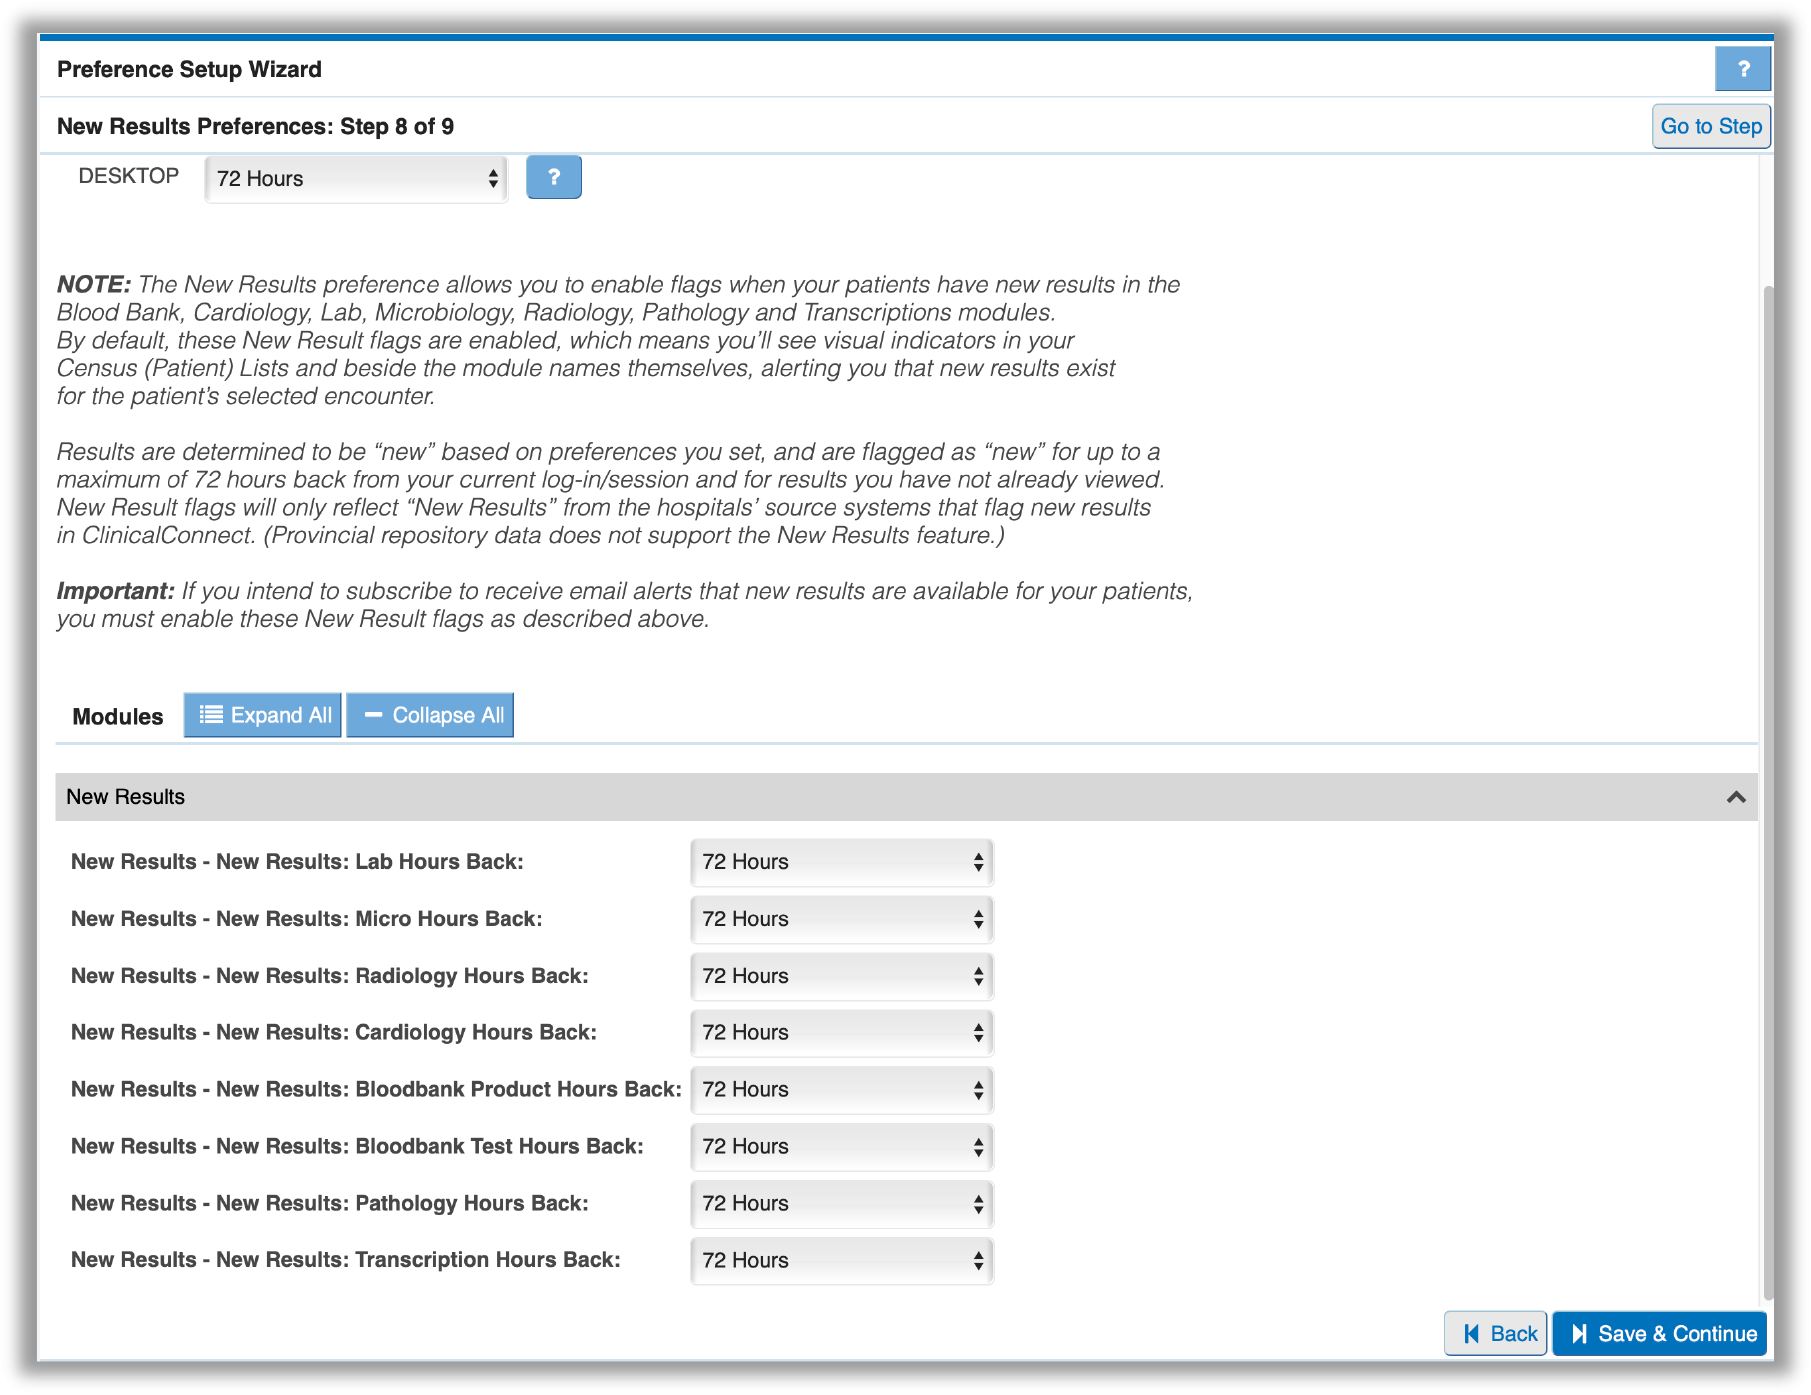
Step 8 - New Results Preferences
The New Results preference allows you to enable flags when your patients have new results in the Blood Bank, Cardiology, Lab, Microbiology, Radiology, Pathology and Transcriptions modules. By default, these New Result flags are enabled, which means you’ll see visual indicators in your Census (Patient) Lists and beside the module names themselves, alerting you that new results exist for the patient’s selected encounter.
Results are determined to be “new” based on preferences you set, and are flagged as “new” for up to a maximum of 72 hours back from your current log-in/session and for results you have not already viewed. New Result flags will only reflect “New Results” from the hospitals’ source systems that flag new results in ClinicalConnect. (Provincial repository data does not support the New Results feature.)
 If you intend to subscribe to receive email alerts that new results are available for your patients, you must enable these New Result flags as described above.
Step 9 - Patient and General Preferences
This last step allows you to set up general Desktop and Mobile preferences such as your preferred default Initial Login View and specifically for Desktop, the option to collapse the Patient Header (recommended), Timeline and Navigation Menu as described below. Once you have changed your settings, they will be applied the next time you log into ClinicalConnect.
Desktop General Preferences

Mobile General Preferences
There are only two general settings in the mobile view.
The General Language setting will default to Use browser locale and should not be changed. The Initial Login View setting can be used to select the Census list or the Advanced Search options as the default when first logging into ClinicalConnect on mobile devices.

After finishing step nine, click Save & Finish and then click Close to exit out of the Preference Setup Wizard and return to your default census view.
![]() Ensure you log out of ClinicalConnect after exiting the Preference Setup Wizard and the next time you log back in, your new preferences will take effect.
Ensure you log out of ClinicalConnect after exiting the Preference Setup Wizard and the next time you log back in, your new preferences will take effect.
 Return to Resource Centre